DAPS is an open source program for transforming DocBook XML into output formats such as HTML or PDF. DAPS is command line based and runs on Linux*.
In XML-based publishing, layout and contents are strictly separated: while writing, you only focus on the contents and the XML tags to use. The layout for different output formats is defined in so-called stylesheets and is automatically applied when converting the XML into output formats.
This tutorial is for DocBook and DAPS beginners. Previous knowledge of XML is not required, but you need basic knowledge of using the Bash Shell. We will write a recipe for a chili sauce in DocBook and convert it into HTML. The tutorial explains step-by-step how to set up your document, which basic XML tags to use for writing it, and how to produce the output shown in Figure 1.

Figure 1: The Goal: Publishing a Recipe for a Chili Sauce in HTML Format #
1 Why Should I Use DocBook and DAPS? #
DocBook is a markup language for technical documentation. Content is
tagged with XML elements according to its meaning. This is similar to
sorting objects into drawers according to their function: For example, you
place scissors and tongs into a drawer labeled
Tools, whereas you place teddies and building blocks
into a drawer labeled Toys. Similarly, when writing
documents with DocBook, you would “sort” the author's name
into an XML tag called author, whereas you would
“sort” a reference to another document into an XML element
called xref.
While this might seem cumbersome at first sight, this approach has the
advantage that you can generate documents in different formats from the
same XML sources. Imagine you want anything tagged with an
xref element to appear in blue in
HTML output, whereas you want it to appear in green
in the PDF output. Or you decide at one point that you want references to
other documents (xrefs) to be displayed in red in all
output formats from now on. This can be achieved
without changing anything in the XML files
themselves. It is only a matter of defining in the stylesheets which color
to use for xref elements in different output formats.
With DAPS, you can convert your XML sources into various output formats with one command. DAPS takes care of converting any images in your documents automatically into the format best suited for the selected output format. DAPS also makes writing and editing more efficient by providing additional features like editor macros, spell checking or link checking. With daps you can also control which stylesheets to use for generating output.
2 What You Need #
The first step is to install a few packages, including an editor with XML support for more efficient writing. Recommended is Emacs and DAPS version 2.0 or higher. Follow the steps below to install Emacs and DAPS:
Open your terminal and log in as root by entering
tux:~>su -Note that
tux:~>or (root #below) stands for your prompt. Do not type that part.Enter your root password.
Install Emacs with zypper:
root #zypper in emacsInstall DAPS with zypper:
root #zypper in daps
3 How to Start #
To be able to process the XML files, DAPS requires a specific
directory structure. Either use daps-init or set it up
manually. The daps-init command is especially advisable
for beginners, because it creates an example and the necessary
structure. File names always end with .xml.
3.1 Working with daps-init #
The daps-init command creates a working environment
for DAPS. In this case, it creates a directory called
tutorial. It contains a DAPS configuration
file for your tutorial (DC-tutorial), the DocBook
XML file located in the XML subdirectory and a subdirectory containing
image files (images). The
image directory will be relevant later (see Section 4.7, “Embedding Images”).
The
daps-initcommand creates a working environment for DAPS. It builds a directory with the specifiedfilename. This directory contains a DC-file, axmlsubdirectory and aimagesubdirectory. Theimagedirectory (see Section 4.7, “Embedding Images”) will be relevant later.daps-init --docdir recipe -r article
Now you can start working on your text. To learn about the needed XML tags, read the following chapters. If you need help with DAPS, open the
daps-initman page in your terminal:tux:~>daps-init --helpOpen the XML file (
recipe/xml/MAIN-daps-example.xml) in your editor and use it as a reference.Open the Documentation Configuration file (
recipe/DC-daps-example) in an editor and use it as reference.Proceed with Section 4, “How to Write”, where we will create another XML file and another DC file from scratch (in addition to the files created by daps-init) and use them to write the recipe.
3.2 Working without daps-init #
This method is suitable for the more experienced writer.
For working without
daps-init, create a directory with your project name and two subdirectories, calledxmlandimages. Open a terminal.tux:~>mkdir recipetux:~>cd recipetux:~>mkdir -p images/src/{dia,eps,fig,pdf,png,svg} xmlNow you have created the required directory structure that is needed by DAPS.
Create a DC-file, which is a configuration file for your project. Open a new file and paste the following lines with your XML file name instead of "MAIN-daps-example.xml". See below.
3.3 Creating an XML File and a Documentation Configuration File #
Now we will create an XML file (that we will use in the following for writing the recipe) and a Documentation Configuration (DC) file (that we will use later on for converting the XML file into HTML output).
To create the XML file:
In a terminal, switch to the XML subdirectory.
tux:~>cd xmlOpen a new file, and paste the following header into it (see Example 1, “Header of a DocBook File”), or copy this from
MAIN-daps-example.xml.Example 1: Header of a DocBook File #
Don't be afraid if you don't understand the header. Just insert it by copy and paste into your file.
Save the file as
recipe.xml.
To create the DC file:
Switch to the directory above (that should be your
recipedirectory):tux:~>cd ..Open a new file and paste the following line into it: MAIN=“recipe.xml”
Save the file, for example as
DC-recipe.
4 How to Write #
4.1 Identifying Start and End Tags #
To categorize content, XML uses tags. XML tags primarily consist of an
element name (such as para for a paragraph in DocBook)
and enclosing less-than/greater-than characters (<,
>). XML tags (<para>) must
be closed. You can do so either with an end tag
(<para></para>) or by adding a backslash
before the final > in the tag
(<para/>). The content between the tags depends on
which element you want to create. Open the XML file
recipe.xml that you just created, and place the
cursor below the header. To define
an article, paste an article start and
end tag into the XML file. Between these two tags, write your text as
shown in Example 2, “Start and End Tag of an Article”.
Example 2: Start and End Tag of an Article #
<article>
Tags and text
</article>
4.2 Adding Metadata #
Each article may contain information about its author, publication date, release information, copyright or other “metadata”. To include such metadata use an article info element and enter the following data (see Example 3, “Article Info Header”):
Example 3: Article Info Header #
<article lang="en" id="art.template">1
<title>Little G's Ceylon Bang</title>2
<articleinfo>
<releaseinfo>
  2013-10-213
</releaseinfo>
 <author>4
  <firstname>Tux</firstname>
  <surname>Penguin</surname>
 </author>
</articleinfo>
<abstract>5
Recipe for a chili sauce.
</abstract>
</article>6

Figure 2: HTML Output (Article Title and Article Info) #
4.3 Structuring Your Document With Sections #
Each article consists of sections and subsections. Example 4, “Example: Structure With Sections” contains a section and a subsection.
Example 4: Example: Structure With Sections #
<sect1>1
 <title>What do you need?</title>
  <sect2>2
   <title>Ingredients</title>
    <para/>
   </sect2>3
   <sect2>
    <title>Equipment</title>
     <para/>
  </sect2>
 </sect1>4
<sect1 id="sec.preparation">
 <title>Preparation</title>
</sect1>
Place the cursor after the abstract end tag and before the article end tag and paste the content of “Example 4” into your XML file.
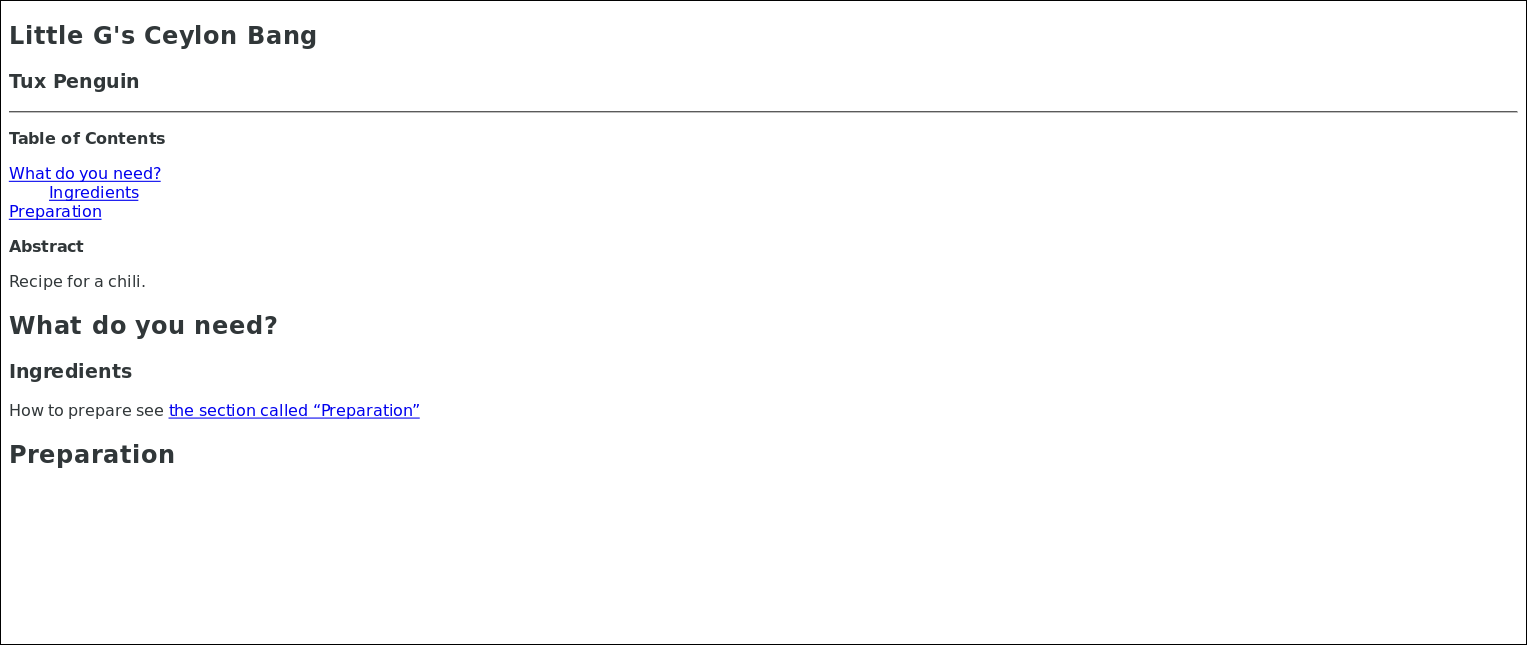
Figure 3: HTML Output (Article With Sections) #
The image above shows the given XML file example as an HTML page. As you can see in the picture, the section level two is a child element of section level one. It is possible to nest sections.
4.4 Creating Itemized Lists #
To create a list, use the <itemizedlist> tag.
Example 5: Itemized List #
<itemizedlist>
 <listitem>
  <para>
   60g Habanero Chilis
  </para>
  </listitem>
 <listitem>
  <para>
   30g Cayenne Chilis
  </para>
 </listitem>
 <listitem>
  <para>
   1,5 Butch T Chilis
  </para>
 </listitem>
 <listitem>
  <para>
   75g Kidney Beans
  </para>
 </listitem>
</itemizedlist>
Place the cursor behind the following line:
<title>Preparation</title>
and paste the contents of “Example 5” into your XML file.
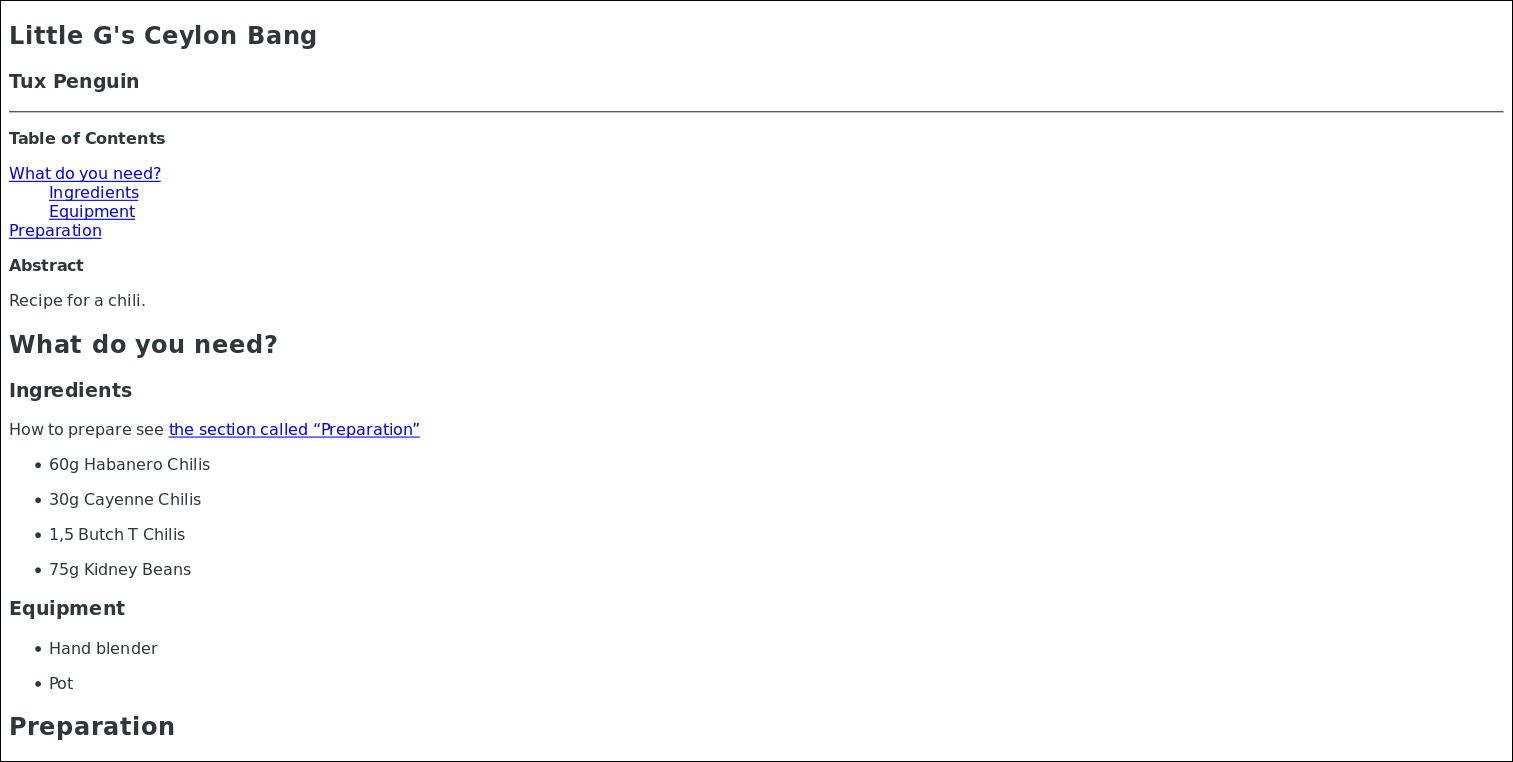
Figure 4: HTML Output (Article With an Itemized List) #
4.5 Providing Step-by-Step Instructions #
For writing instructions, it is recommended to do it step-by-step, as you can see in the following Example 6, “Example of Step-by-Step Instructions”. That way, instructions are easier to understand and browse for the reader.
Example 6: Example of Step-by-Step Instructions #
<procedure>1
 <step>2
  <para>3
   Rinse, than drain the kidney beans for about 10 minutes.
  </para>
 </step>
 <step>
  <para>
   Fry kidney beans with some oil.
  </para>
 </step>
 <step>
  <para>
   Puree all ingredients.
  </para>
 </step>
 <step>
  <para>
   Cook for about 5 minutes.
  </para>
 </step>
</procedure>
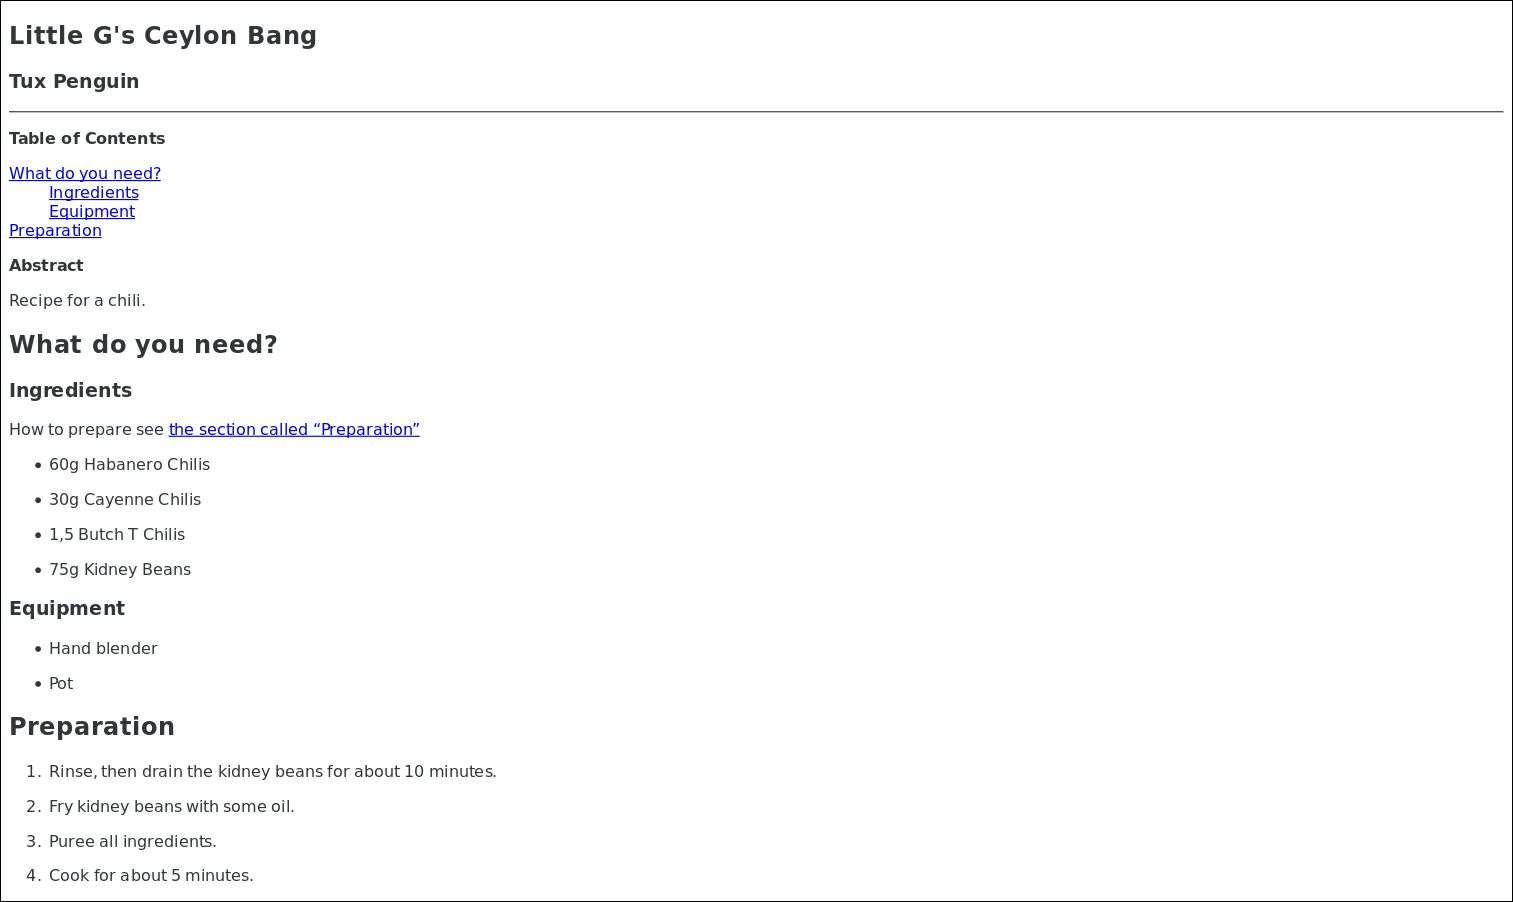
Figure 5: HTML Output (Article with Step-by-Step-Instructions) #
4.6 Inserting Remote Links and Cross References #
4.6.1 Remote Links #
To refer to an external HTML page, integrate an internet link in your tutorial.
Example 7: Integrating Remote Link #
<para>
 Before you start to cook:
 <ulink url="http://www.crazyhotseeds.com/top-10-worlds-hottest-peppers/"/>
</para>
To get the output shown in Figure 6, place the cursor behind the
</para> end tag within the
<abstract> element and paste the content of
“Example 7” into your XML file.
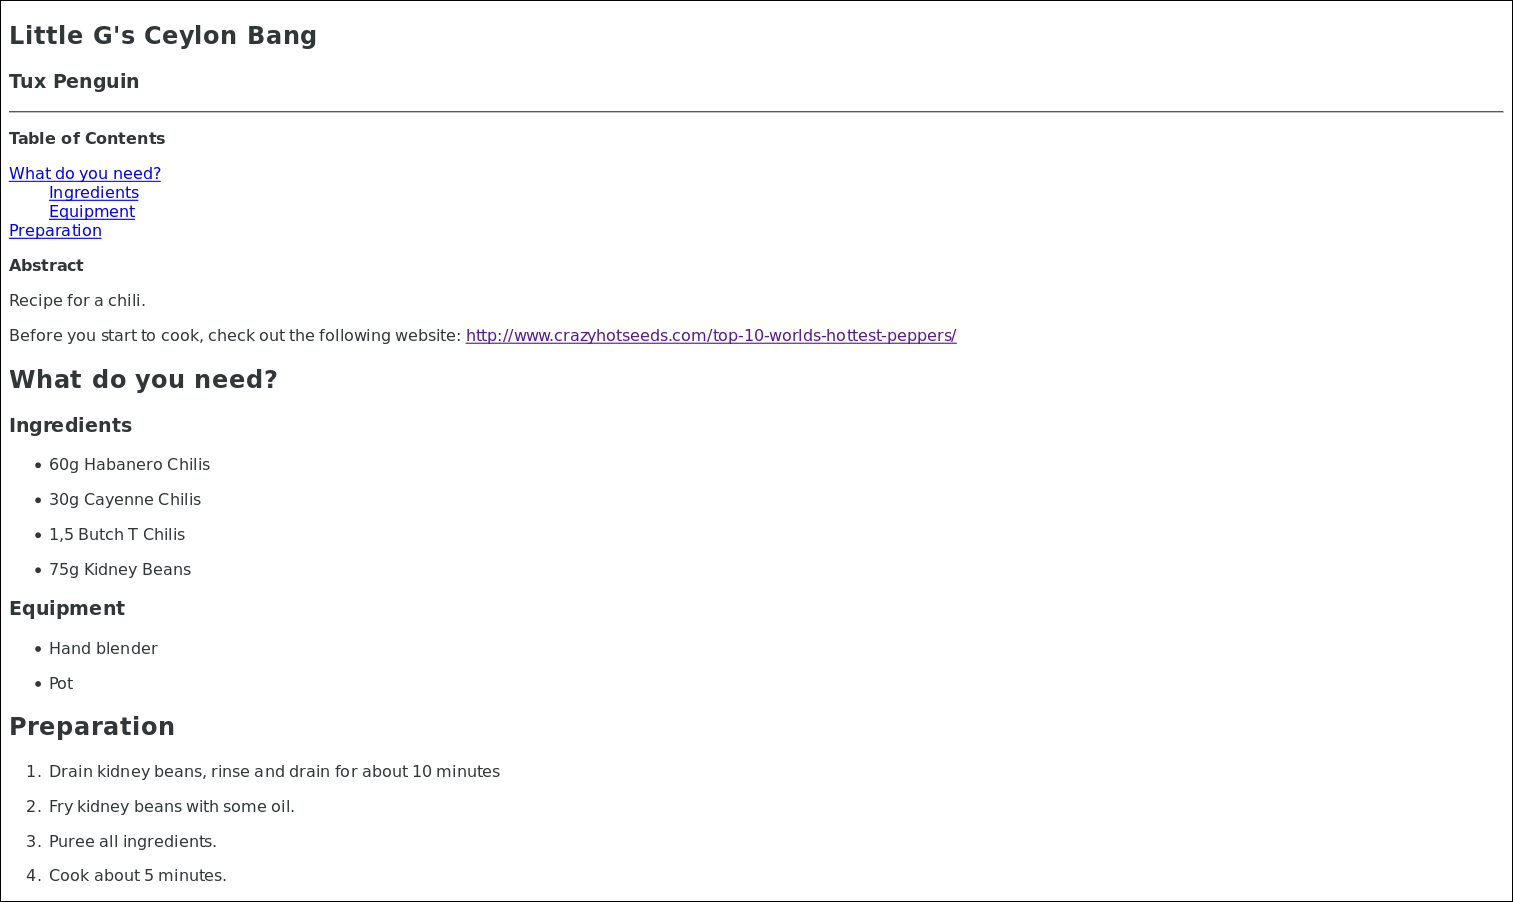
Figure 6: HTML Output (Article with Remote Link) #
4.6.2 Cross References #
With cross references (xref elements) you link to paragraphs or examples within your document.
Example 8: Integrating Cross References #
<para>
 How to prepare see <xref linkend="sec.preparation"/>1
</para>

...


<sect1 id="sec.preparation">2
To get the output shown in “Figure 7”, place the cursor below the
<title>Preparation</title> element and paste the
contents of “Example 8” into your XML file.
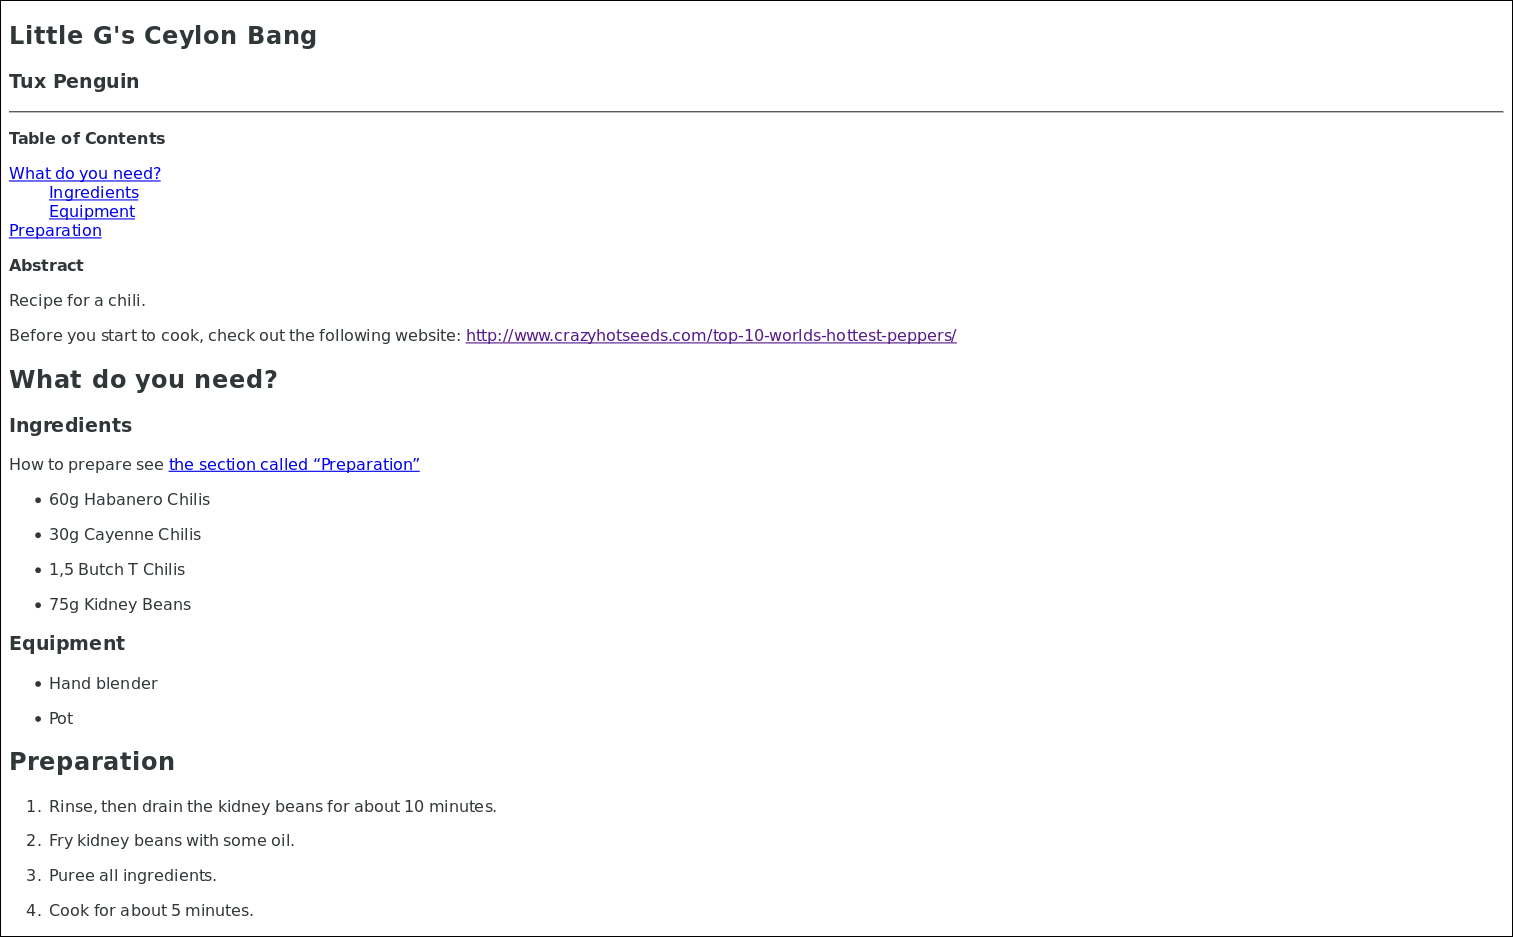
Figure 7: HTML Output (Article with Cross-Reference) #
As you can see in the screenshot, the underlined part is a link to the section“Preparation”.
4.7 Embedding Images #
To add an image to your document, save the image you want (for example,
butcht.png) into the directoryimage/png. If you save it to different directory, DAPS will not be able to locate it.Add an image reference into your XML file.
Example 9: Integrating Images #
<figure>
    <title>Butch T Chili</title>1
    <mediaobject>
    <imageobject>
    <imagedata fileref="butcht.png"/>2
    </imageobject>
    </mediaobject>
</figure>Image title. In the output formats, the title will appear together with the image. | |
The image reference. |
Figure 8: HTML Output (Article with Integrated Image) #
5 Convert Your XML Files #
You can convert the XML file at any time, no matter if it is finished or you only want to see the temporary result. Convert as often as you like.
Important
The XML file must be valid, otherwise the conversion will fail. Check if it is valid:
daps -d DC-tutorial validate
5.1 Convert Your XML File Into PDF #
Open a terminal and enter run the following command:
tux:~>daps -dDC-tutorialpdfDAPS automatically creates a directory called
build. DAPS saves the resulting PDF file in the build directory.
5.2 Convert Your XML File Into HTML #
To build an HTML page, open a terminal and enter the following command:
tux:~>daps -dDC-tutorialhtml --singleYou get a green colored link, which you can open in a browser, such as Firefox.
6 Further Information #
If you still have questions or need additional information, read the DAPS man page. To open the DAPS man page using the following command:
tux:~> daps --helpAlternatively, visit the following links: